I cut the tags from an old book and stamped the words on it.
Next using wax from a red tea light I coated the paper. A bit of a mess.
I then burnt the edges to age it. They are now ready to punch a hole in.
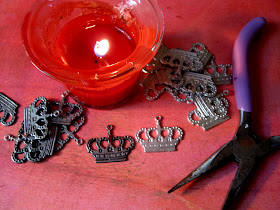
The crowns are very inexpensive and were way to shinny. Easy fix was to use pliers to hold it over a flame. I like this look much better.
The burlap was almost new I wanted it a little darker so I soaked it in coffee and tea. The longer it sat in the coffee the darker it got.
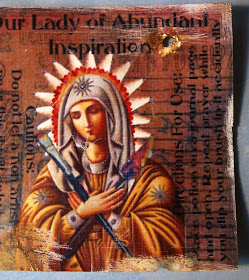
I was impatient and pulled it to soon so I used some diluted paint as a light wash.I would love to print on old paper but my printer just rips it up. So the next best thing to do is ruff it up with sand paper. I even sanded a hole to add authenticity. I also used Distress Ink and brushed it with a little water. Now I'm happy with it.
I love building all the elements to a project but when you get to put it all together that's when the fun starts.The label says "Our Lady of Abundant Inspiration" I hope this can inspire you to try to age a project of yours.


great tips Tory, thank you
ReplyDeleteThanks for walking us through the project, Tory. Your results are amazing!
ReplyDeleteAnd where, oh, where did you get such wonderful brown bottles?? Ha ha -- I better get to drinking some more kombucha!
Thank you for the show and tell, I like the projects, very nice.
ReplyDeleteOooh Tory--VERY cool. Thanks for all the technique too!
ReplyDeleteThanks, Tory, for walking us through this fabulous little project! Love the results. I think I need one of these for an art shrine.
ReplyDelete