Showing posts with label tutorial. Show all posts

Sunday, January 8, 2012

Out with the Old--Garland Tutorial

My house always looks so drab after I take down Christmas decorations, so this year I made a little New Year's garland to add some spark.


It was so fun to do and cleared out some of the old to make way for the new. It's kind of an anything goes project, but here's how I did it.

I started with a very ugly painting exercise (maybe to see how many garish colors I could put in one piece?) I had done on watercolor paper. I kept thinking I'd repaint it, but it was better to get rid of it. On top of it, I free wrote thoughts about what I wanted for the new year.

I punched 2" circles out of that and punched smaller circles and shapes out of other old projects.
I wrote some guiding words for the year on another old painting and tore them into pieces. And cut a pile of silk and velvet fabric scraps.

I built little piles on the 2" circles and anchored them with scribbly free-motion stitching.

Then attached two circles together back-to-back and did more scribbly stitching to hold them together.
And finally I chain stitched them all together into garlands. I like the additional scribbly lines that the loose threads add, so I didn't trim anything.

They were very addicting to make and got rid of some ugly past at the same time.


Wednesday, April 28, 2010

Little Art Bag

I have been having fun dying, coloring and stenciling fabric, I'm making little bags that will hold hand outs and supplies for a class I will be teaching in Hampton, Va in a few weeks.
I put an informal "how I do this" on my blog but forgot to show the bird and best of all these cool little crayons called NEOCOLOR II a water soluble wax pastel. They will write on just about anything and as it says they will blend with a damp brush. They are a bit expensive but try out a few basic colors then go for the BIG box. Here is a link to see all the things they can do.
You can see the back side of the bag on my blog. Have fun creating.

Thursday, December 17, 2009

Garland Tutorial

As I promised early, here is how I make the garlands I use for display in our show.

Step 1: Gather white and cream fabrics. Use light weight pieces. I especially like those that ravel. A little netting is nice for body. Avoid satin or double knit polyesters--the heavier fabrics will droop.


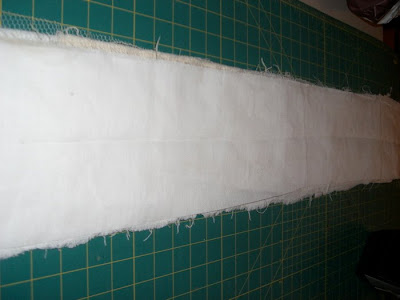
Step 2: Cut fabrics across the width in 6" strips. Cut one strip each of 6 different fabrics:

Step 3: Crease one piece in half lengthwise to use as a guide. (Don't iron on your Olfa mat):


Step 4: Stack all 6 fabrics on top of each other with the creased piece on top:


The lengths will all be a little different, don't worry about it. You can trim the ends later if they bother you:


Step 5: Pin along center crease to hold all 6 layers together:


Step 7: Stitch 1/4" from either side of the center crease:


Step 8: Cut strips 1/2"-3/4" perpendicular to the stitching. Cut close to the stitching on either side, but do not cut through it:

Step 9: Run the garland through the washer and dryer, and this ruffled loveliness will come out:


I'd love to see variations of this if you try them. I keep meaning to try some colored ones, but haven't gotten around to it.

My family is arriving in two days to spend Christmas with us, so I will probably be silent until after the holidays. Happy Holidays to Everyone!