
Lenall


1. What are the main mediums you use? What do you find satisfying about them?
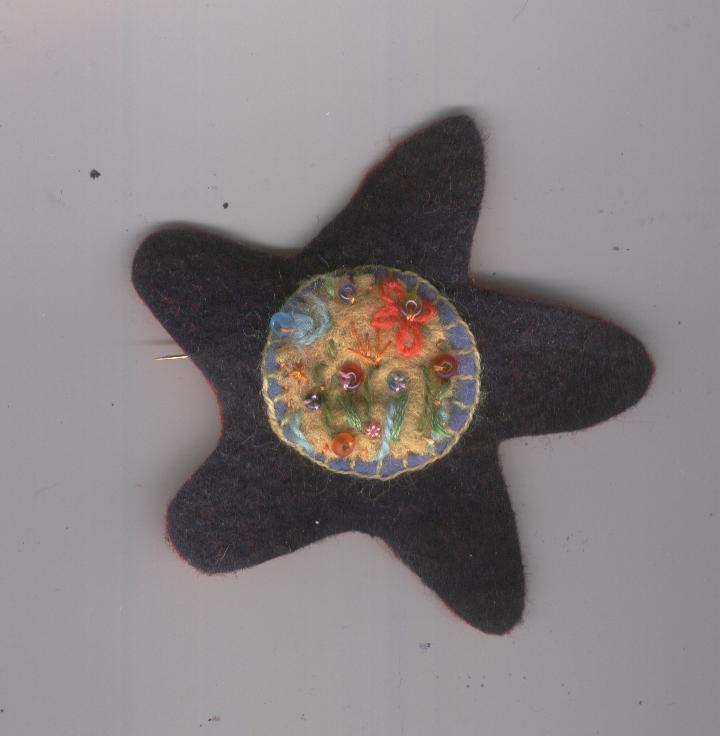
Beads. Lots and Lots of Beads! My first class in beadwork was January 1993 and I haven't stopped playing with them since. When I've had a particularly stressful day/week/ month, sitting down and going through the motions of picking up a bead, pulling the thread through and starting over can be a very calming and meditative practice. I've kept my sanity these past years by beading. (Bede is Middle English and means prayer.) A word of warning: beads are as addictive as drugs and just as expensive. The nice part about this addiction, you end up with some great jewelry that you can brag about and maybe even sell.
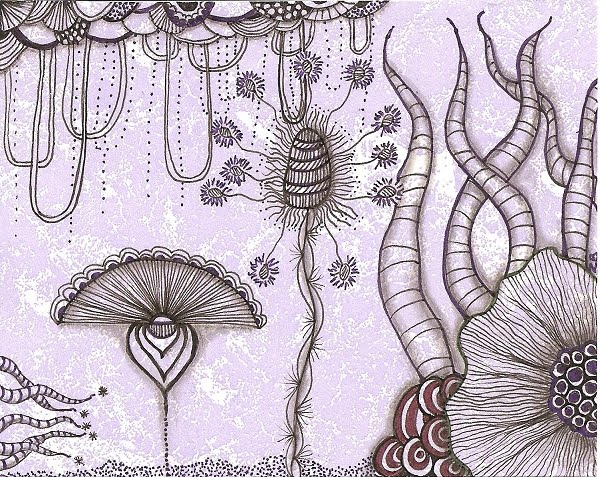
When not beading, I use a new form of doodling called Zentangle, www.zentangle.com For someone who cannot draw, (really, I can't), it gives me the self-assurance and confidence to continue with my art. I can doodle myself a cool picture using one line at a time. This, too, is very addictive. You do get some cool art out of it so....things even out.
2. If someone were going to get started in those mediums, what suggestions would you give? (classes, materials, book recommendations, general tips?)
Classes are the best way to learn beadwork. You can get hands on instruction and meet some very nice people. Check out your local bead store to see if they have a class schedule or if not, who they might know that can teach you. Books are the next best thing. I've been collecting beading books since I started and there is no one book that can teach you everything. Check out your library for the beading books you like before purchasing them. And you will be buying books.
3. A perfect art day would look like_________
Partly cloudy, mid-70's, no wind, out on the deck with my beads and bead magazines, no interruptions, no cares and no responsibilities. I can dream......Wha? What? The cat box needs cleaning? *sigh*
4. Do you have dedicated studio space? Give a brief description of where you work.
I have the back bedroom as my studio with all the beads, collage, stamping, painting and whatever, for all my art activities, if I can get to them. (The studio is an art storage room at the moment.) However, I spend most of the time in the living room at the Bead Desk. It's a beautiful oak roll top with big drawers and lots of cubbies. It's positioned by the living room windows so I get lots of natural light, whenever the sun comes out. I can also watch the birds and the squirrels on the deck when I need to rest my eyes.

5. Favorite place you've visited or lived?
I'm now living in my most favorite spot. Five acres, in the woods, off the road and away from most of civilization. My grandparents had a cabin in the woods outside of Camptonville, CA when I was growing up and I've always loved the mountains. Mt. St. Helens is a clear shot down my driveway and Mt. Hood stands tall over the road as I drive out. It's the closest thing to paradise I can think of.
6. What inspires you (or are there recurring themes in your work)?
Well....the aforementioned five acres in the woods is a good start to my inspirations. There are so many textures and designs in nature that keep my creative juices flowing. Also, sometimes it's just the beads themselves that can spark an idea. I enjoy looking at other artists work, and might take part of their idea and turn it into something beady.

7. I still struggle with_______________
Deadlines. I think I give myself plenty of time to get pieces done for a show or competition and before I know it, time has slipped by and I missed it. Sticky notes are my friends, but if I keep losing more of my mind the house will plastered with them.
8. I'd be lost without__________
The great friends at PAC. They are fun and funny, creative and clever, inspirational and insane. Time with my Arty Girls is special time for me. Oh...I'd also be lost without my Fire Mountain Gem and Beads Catalog.

9. Favorite dessert?
Anything chocolate. Except chocolate covered bugs or anything chocolate covered from Monty Python.
10. What's on the horizon?
Continue with my Earrings 365 challenge of making a pair of earrings a day for a year. Work on some new bead and paper collages that my Muse recently suggested and enter some art shows later in the year.

I am auctioning off all those pairs of earrings, one weeks worth at a time, to help two charities. http://www.aplacetobark.com and http://www.catadoptionteam.org are two no kill shelters for unwanted cats and dogs. You can see all my earrings at http://www.zannesbazaar.blogspot.com and click on the Earrings 365 page. Then if you see something you like, go on over to http://www.onlineauction.com/store/zannesbazaar to bid on them. Thank you for helping out our furry little friends.


Jennifer:
Ahhh, the “O” word…what an appropriate question for “Get Organized Month”!
As a professional organizer, I have organized many studio spaces. I’ve taught 3-hour workshops on the subject and many books have been written on how to organize art spaces. My favorite method for organizing an art space is to use Julie Morganstern’s SPACE system – sort, purge, assign a home, containerize, equalize (maintenance).
So I’ll begin with a quick sort of what’s visible, identifying items and categorizing them. Toss or recycle obvious trash. Separate out incomplete projects to be decided upon later (that’s a whole other topic). I’ll keep to that one area selected so the client and I will be able to see progress. Breaks are important during this process – and when the client and I come back from a break to see a beautifully organized area, we are encouraged to move on to the next section.
During the purging process, the client and I will be creating categories and thinking about what there is truly space for, how much time it will take to find supplies to create with, and which items to pass on to friends or charities.
Next we’ll be assigning a home for items. I like to have “like with like” and store adhesives together, beads in another area, tools for a particular project type together, tins on shelves…When like items are stored together, it’s easy to retrieve and put back frequently used items.
Containerize – this is where containers are decided upon. Many clients have all of the containers they need already (and have emptied during the sorting process). Choose containers that you love and that fit in with your personal style. You will also want your containers to be sturdy (and any drawers to open easily). Make sure the containers are a proper fit for the number of items you will be storing – leave room for adding new items as your work grows and changes.
Equalize – Evaluate new systems about two weeks after organizing. Does something need to be changed around? Integrate a periodic maintenance program into your lifestyle, keeping it simple. Ongoing maintenance will keep a system running smoothly.
Jennifer Campbell – Professional Organizer and Creativity Coach
www.TheArtofOrganizing.net

 And now how some of us non-professionals approach the problem.
Lorraine:
I keep stuff in clear plastic tubs. Rather than pay money for them, I use the ones that my friend collects for me. She buys the organic spinach at Costco which comes in large rectangular plastic tubs. I have trouble separating the lid from the tub so I add a tab of masking tape at the corner. That way, I can lift up on the tab and the lid comes up. Presto!
Suzie:
I put like things with like. And they are in containers that are labeled, or see through. My studio is a bit like a 747 cockpit: very small but everything is within reach.
I’m also getting a Fujitsu Scan snap to scan magazine articles and class instructions so I can save space for other stuff. I’ll organize articles by media and such as calligraphy, watercolor, book arts etc.
Robin:
I've learned that it doesn't really matter how well I organize my materials, as soon as I start a project, it looks like a tornado moved through. I guess my one tip is to clean up and organize materials between major projects so the pile doesn't get too bad. I tend to organize by color and have shelves of fabric stocked that way. But then there's a special bin for silks, one for velvets, one for hand-dyes. The plastic bins could easily take over my studio.
Dayna:
I'm the queen of organization because if my supplies aren't organized, I suffer from severe bouts of inertia. One of my favorite organizational tools is using inexpensive plastic drawers and bins, which I label using an old school labeler. I'm also a big fan of jars as I love the look it creates: a jumbled mess of order and you can see what's inside!
Scenes from Dayna's delicious studio:
 She uses an old bed frame for display:
Steph:
Well since I am so organized I just had to jump in.(ha) For me after this last go round of excavating long lost/ forgotten suplies, the #1 tip is if it's out of sight it's out of mind. Sooo, SEE through, think jars (thanks Dayna) clear containers, and big bold labels. Like supplies grouped. I just might start working efficently! but don't hold your breath
Paula:
Since I'm going through this process of clearing out my studio, I like the idea of keeping art supplies in sight with clear containers and items easily marked. Thanks, Steph. I went to your blog and saw the great job that you did reorganizing your studio. It gives me hope to complete this project here.
Suzanne:
The biggest organizational challenge in my workspace is finding what I need in order to work on a project. Spending time to search for things can easily bring the creative process to a grinding halt. A couple of things that help me are organizing supplies like beads and fabric according to color groups, and storing things in a way that they are always visible. For example, I find the clear plastic bead boxes very handy. Also, I keep fabric in large clear plastic boxes by color on shelves; not the prettiest arrangement, but it's function over form for me!
Suzanne's perfectly organized bead box:

Tammy:
This takes a little time at first, but when I'm done it is terrific. I found a great organization thing that works great for me. I have all my art supplies and other art pieces in plastic drawer units, as well in dressers and other stuff like that. I put everything away in the drawers. I put all the often used things in one location, all the sewing things next to my machine, etc. After it was all placed, I numbered every drawer (1,2, etc.). Then I made a list of everything in all the drawers, typed it in the computer listing the name of the item ( Scissors) and the drawer number (7).
After this task was finished, I hit sort and put everything in alphabetical order. Now I can find anything in a flash, and others in my family can find things they need to borrow as well.
Maggie:
I’ve been challenged by trying to design a space for two purposes. By day I am a management consultant—mostly head work on my computer and phone. I also aspire to making jewelry and paper arts—mostly hand work. I’ve finally resolved it by having two separate tables and ‘stations’ of storage around the room. Bookshelves and files for reference. Drawers and containers for art supplies. The best thing I EVER incorporated is my library catalogue with a drawer for every color bead and finding. It makes me feel like an organized artist!
Maggie's much coveted library catalogue:
 Any other ideas? We always need them!